Configuration
Google Analytics
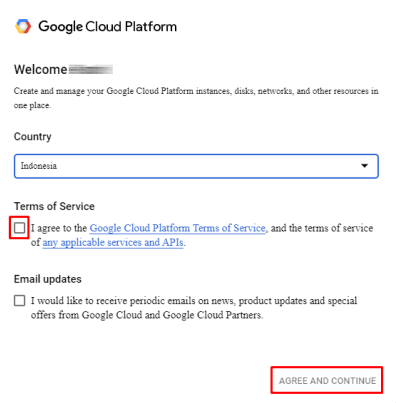
If you are using GoogleAPIs for the first time, you will find the following display. Click "I agree .." in the Terms of Service and then click "Agree And Continue"
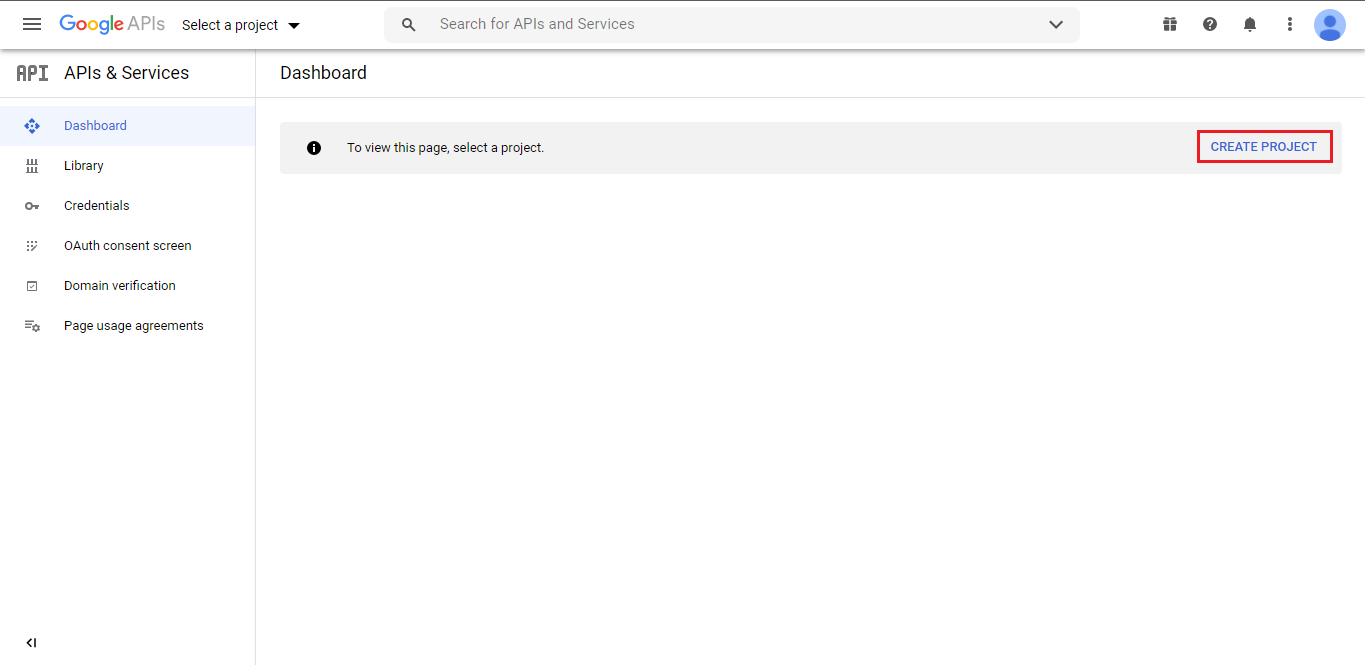
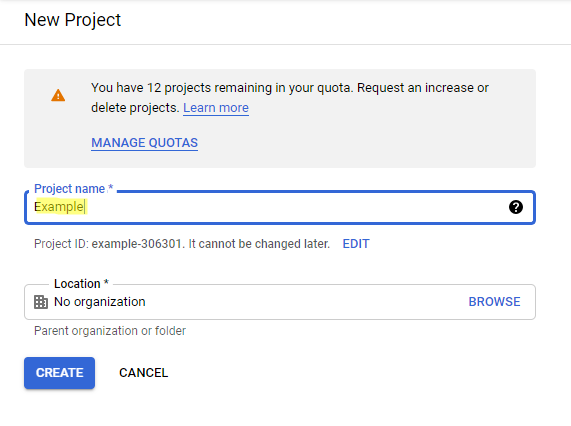
Click CREATE PROJECT
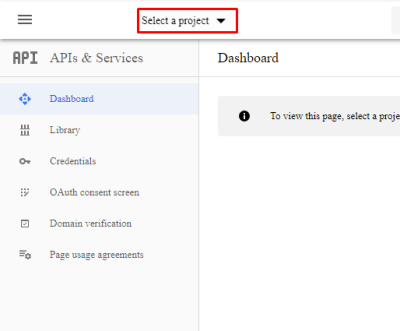
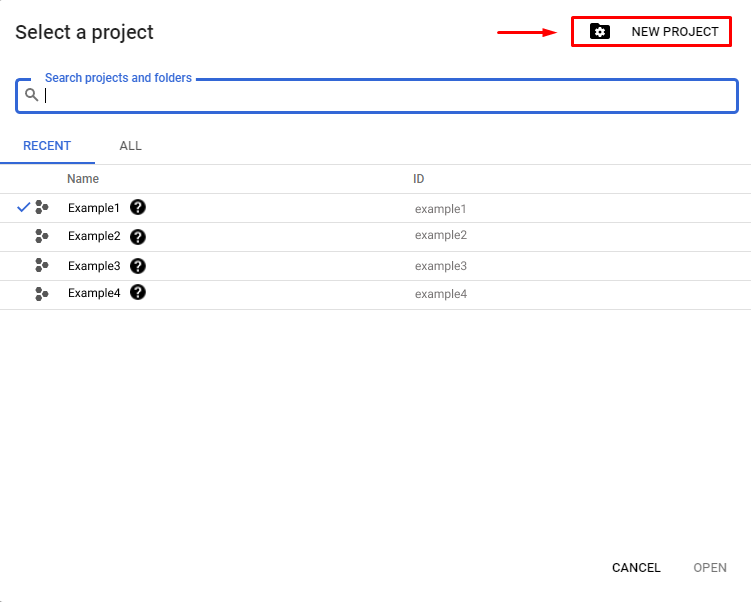
If you’ve made a project before, click select project from the top bar menu:
Click NEW PROJECT
-
Type a new project name
-
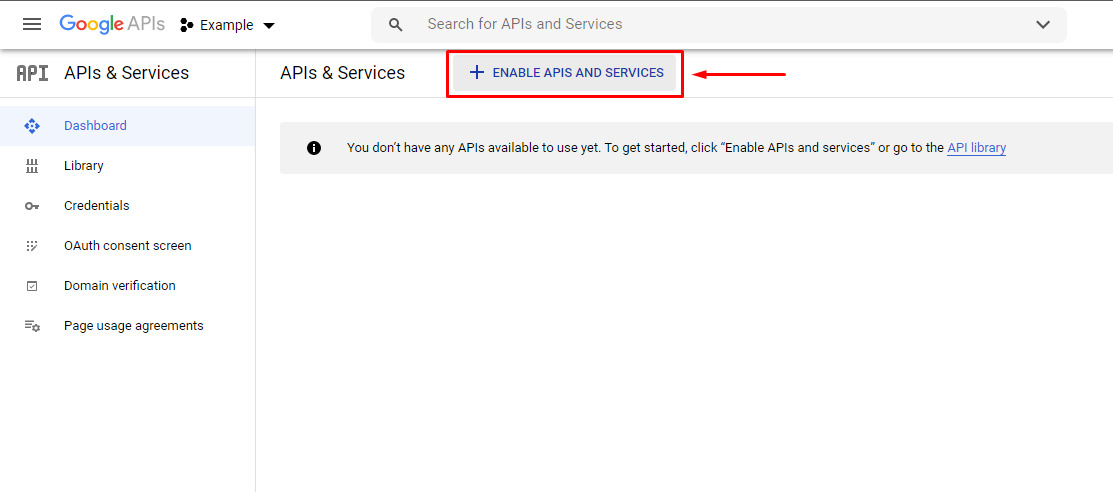
Click ENABLE APIS AND SERVICES
-
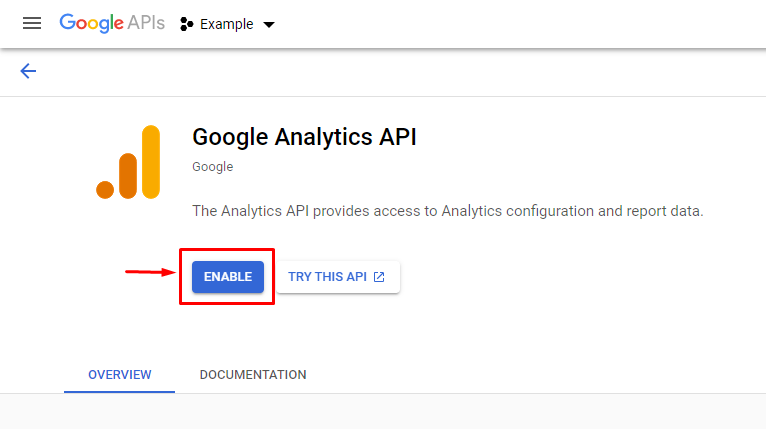
Find and select Analytics API

-
Click ENABLE
-
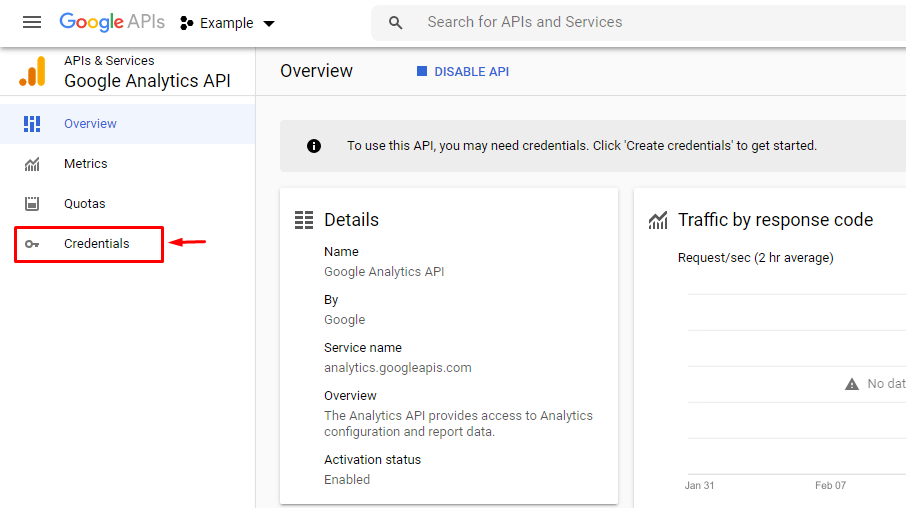
Click Credentials
-
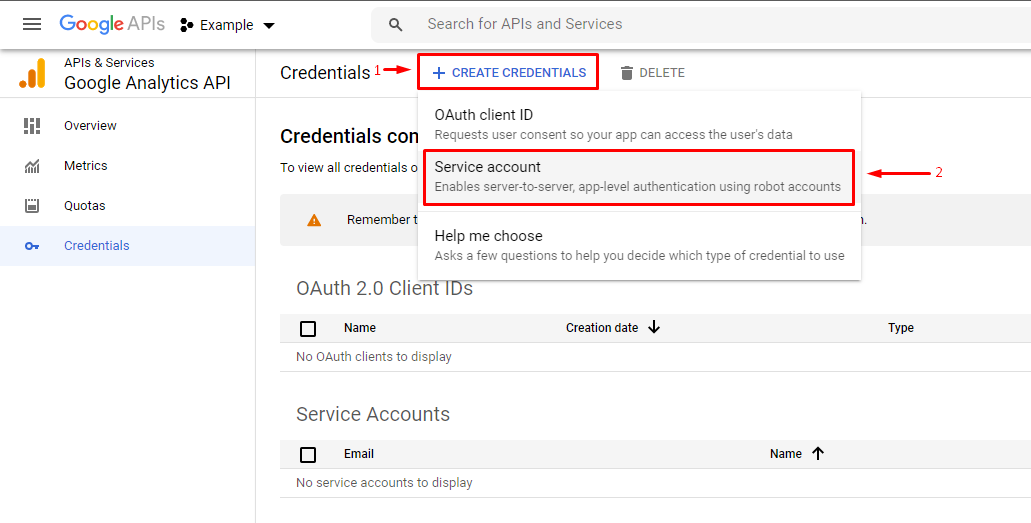
Click CREATE CREDENTIALS, click Service account
-
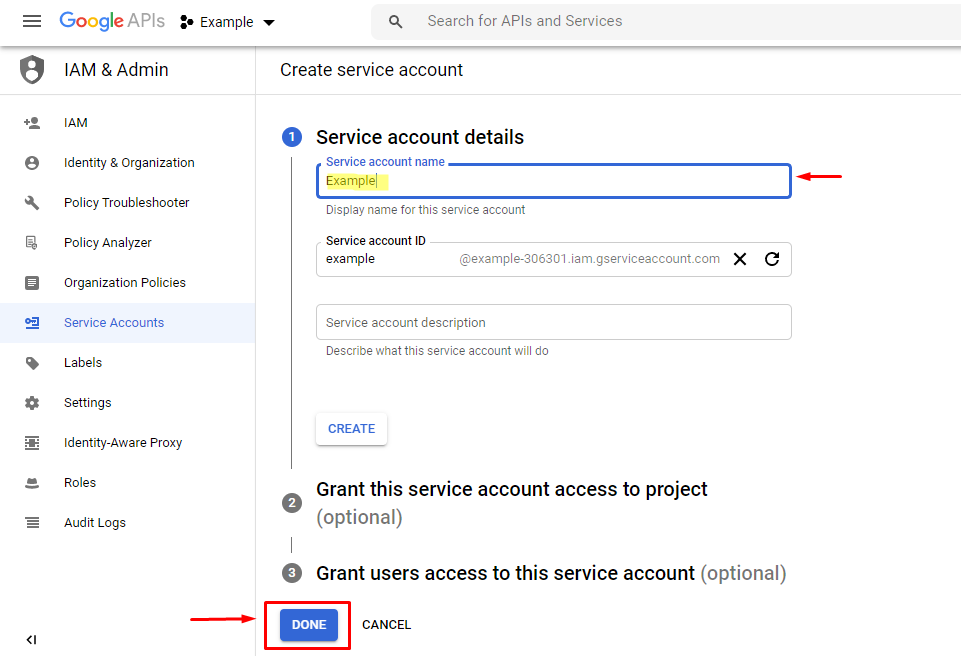
Type Service account name, click DONE
-
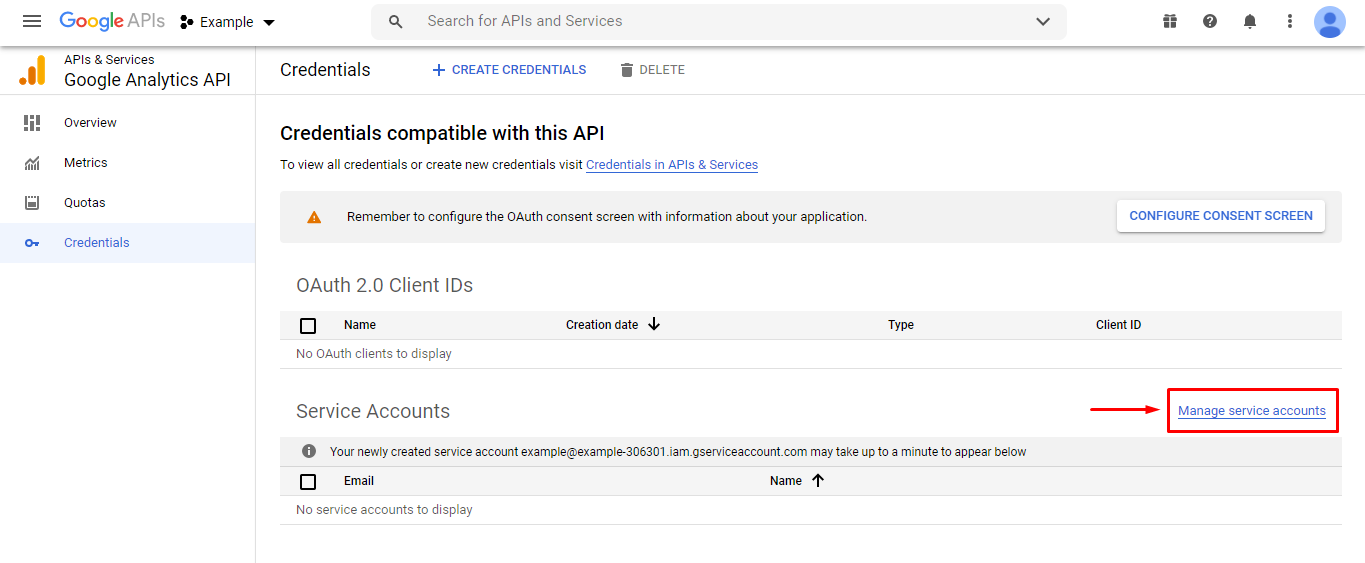
Click "Manage service accounts"
-
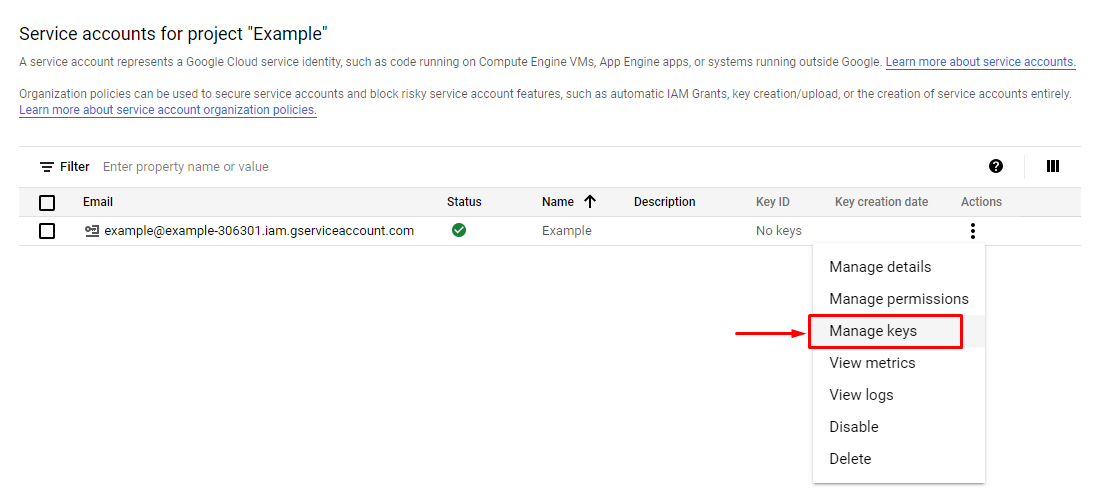
Click Actions and select "Manage keys"
-
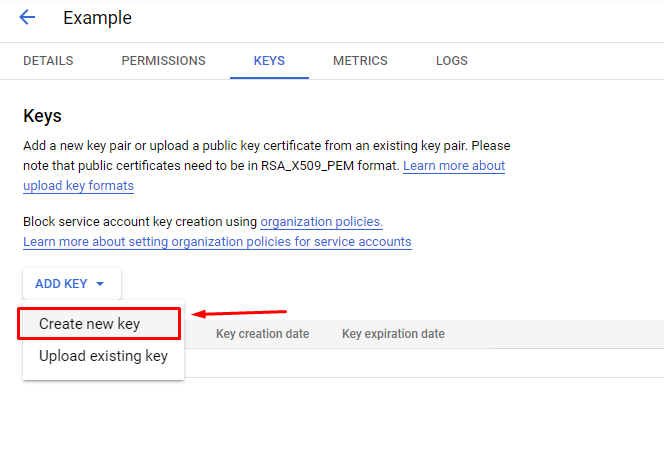
Click "ADD KEY" and select "Create new key"
-
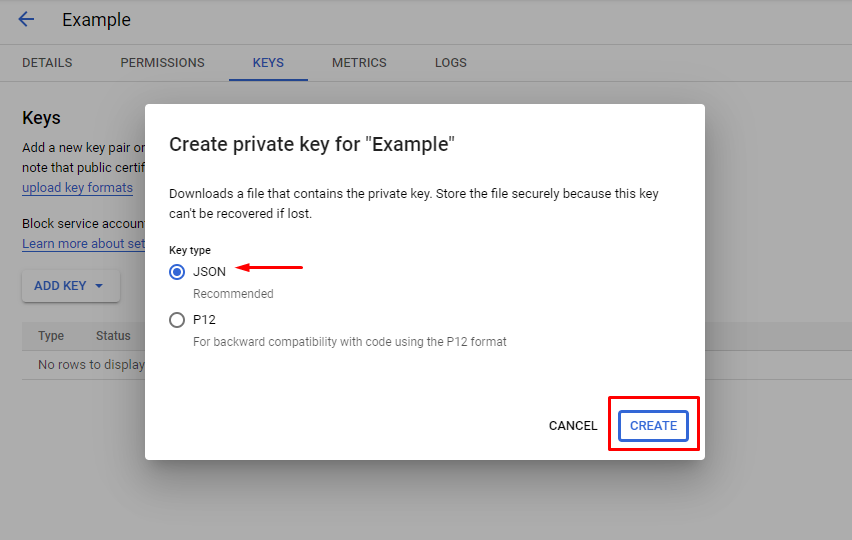
Select key type "JSON"
-
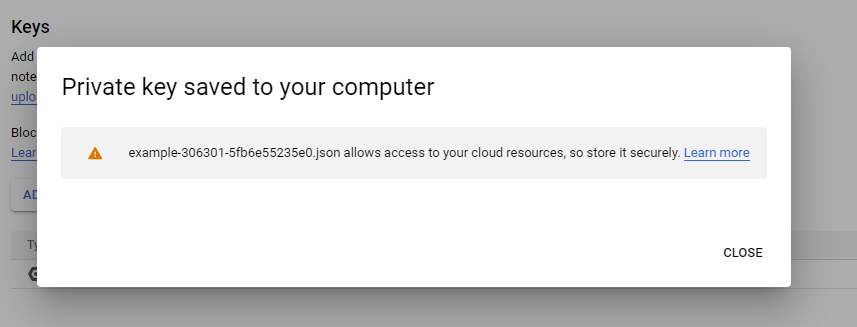
The json file will be downloaded automatically and a notification "Private key saved to your computer" will appear. Click CLOSE.
Rename file name-xxxxx-xxxxx.jsontoservice-account-credentials.json, and save instorage/app/analytics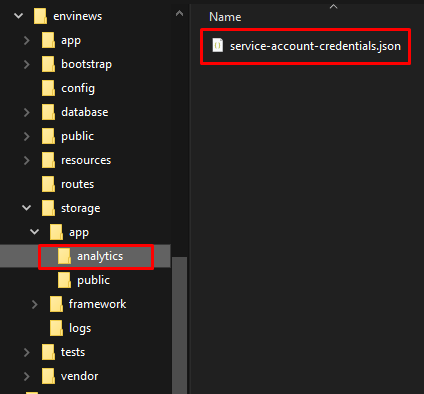
-
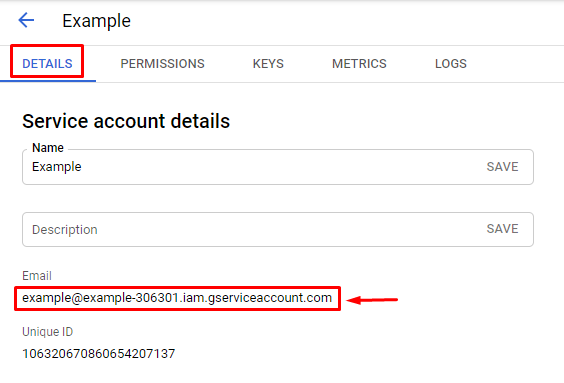
Go to the details tab and copy the email shown
-
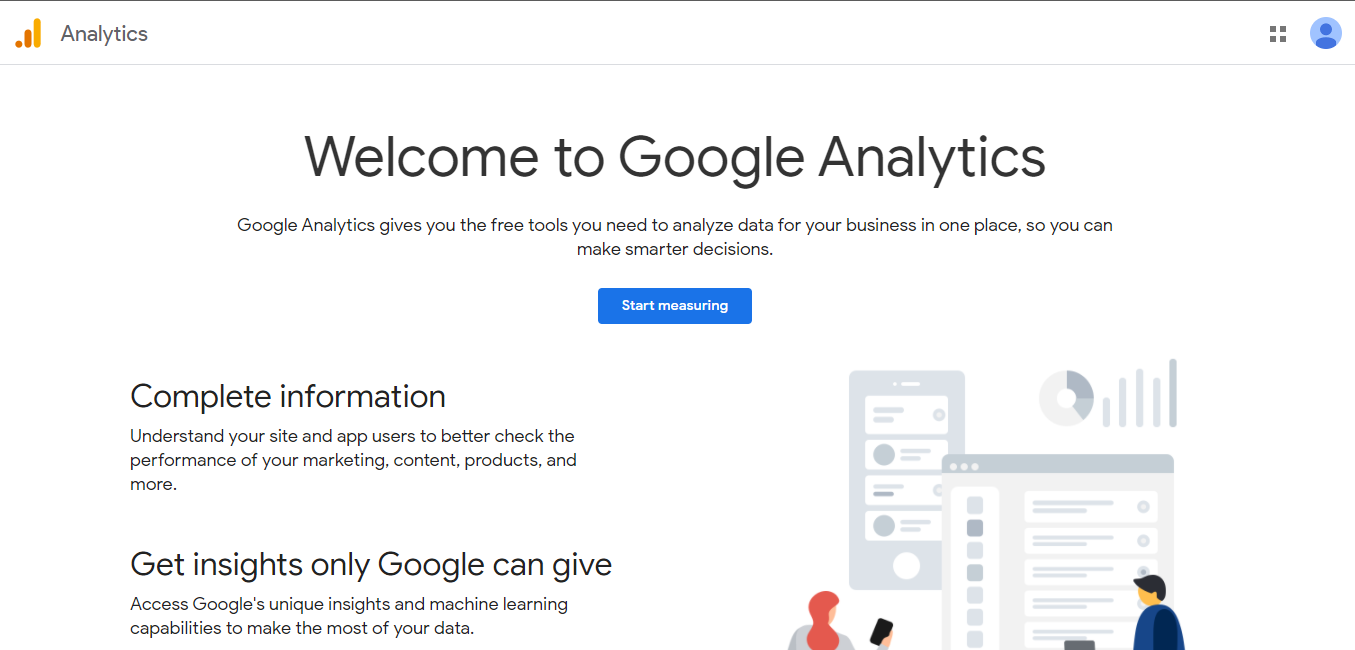
Go to https://analytics.google.com/analytics/web/
If you open Google Analytics for the first time, you will get the following screen:
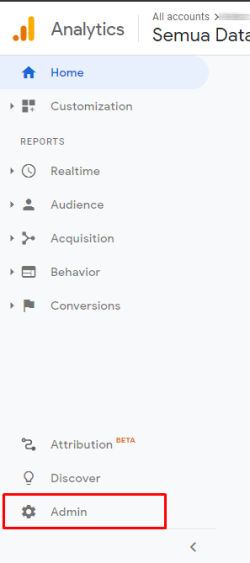
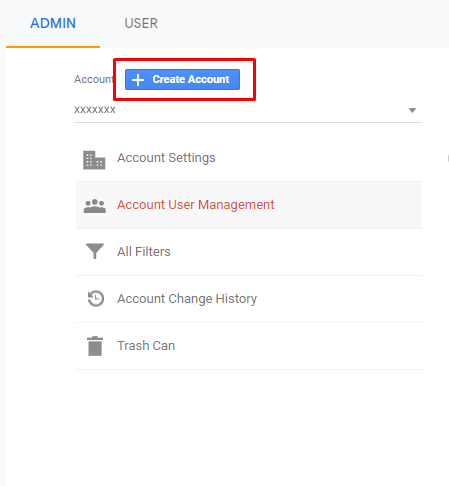
If you already have an account name, select admin:
Click "Create Account"
-
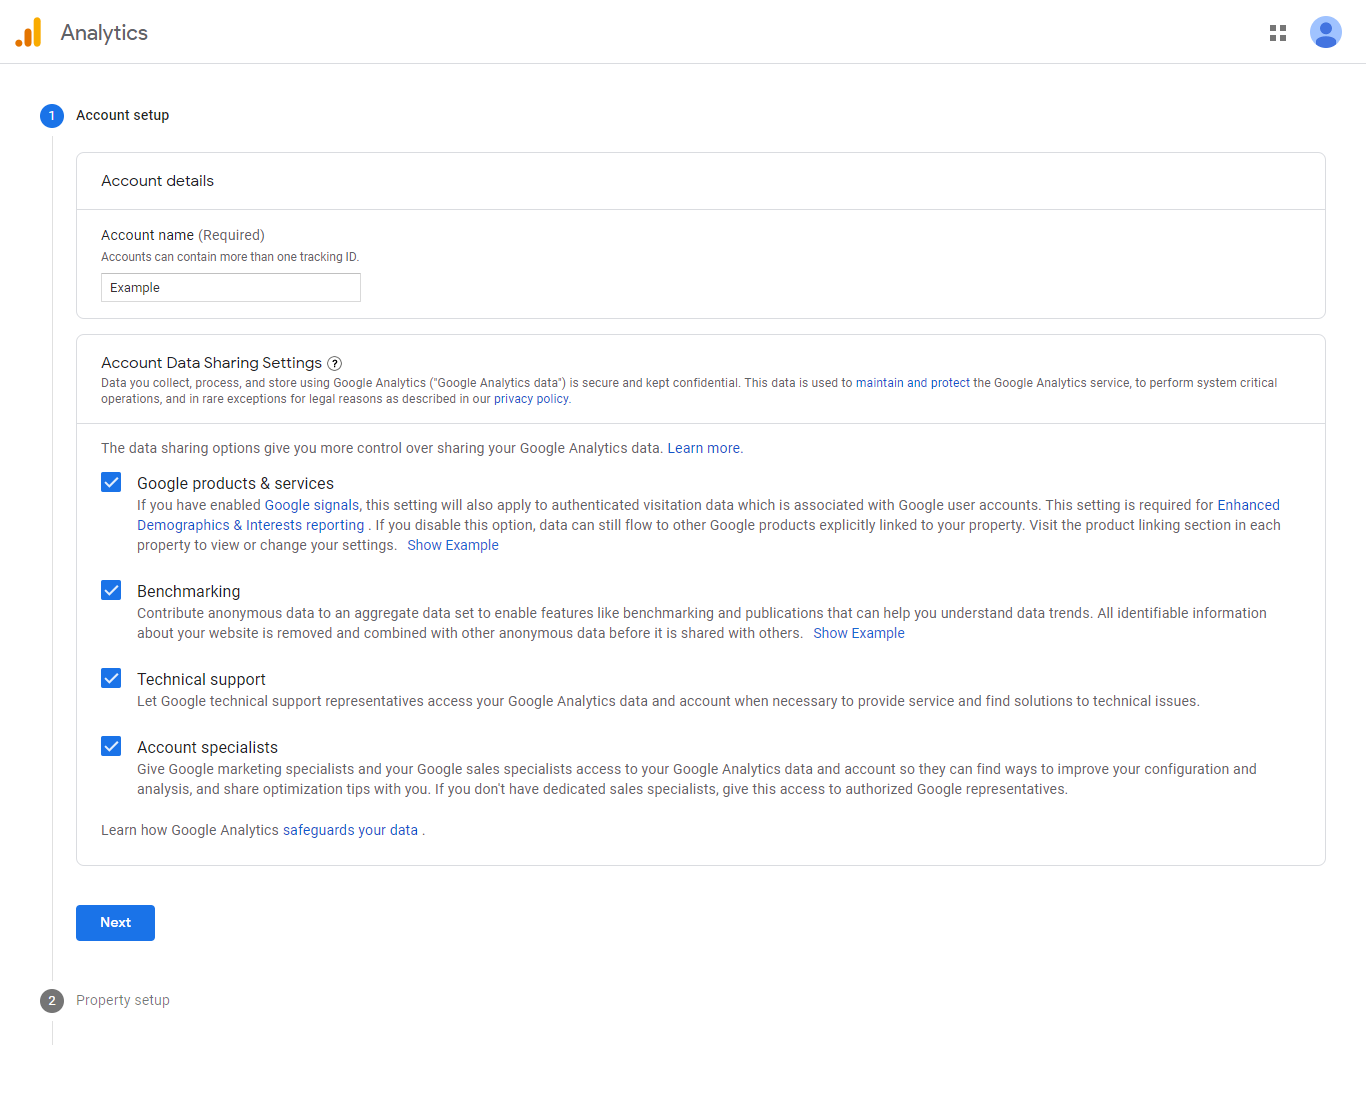
Type in the account name and then check all data sharing options. Then click Next.
-
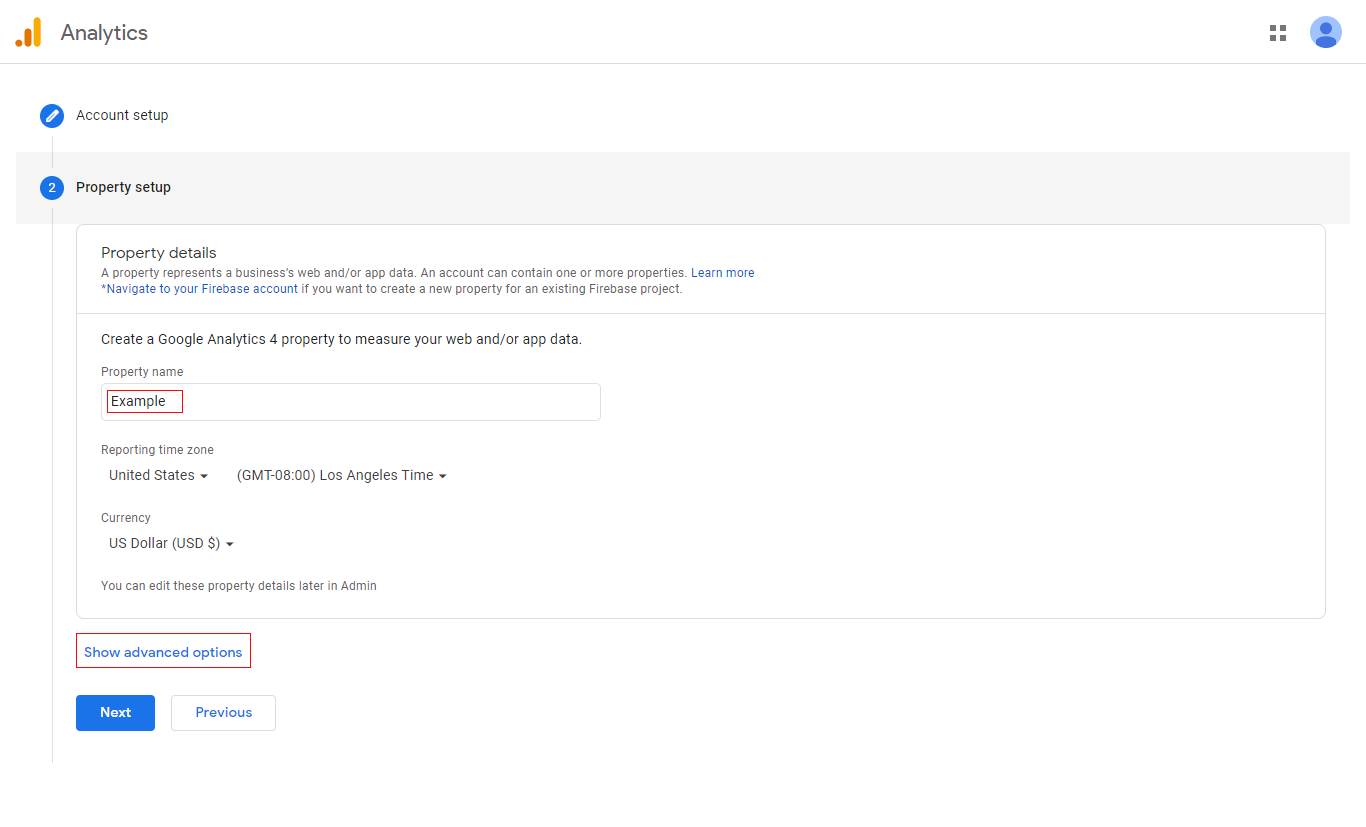
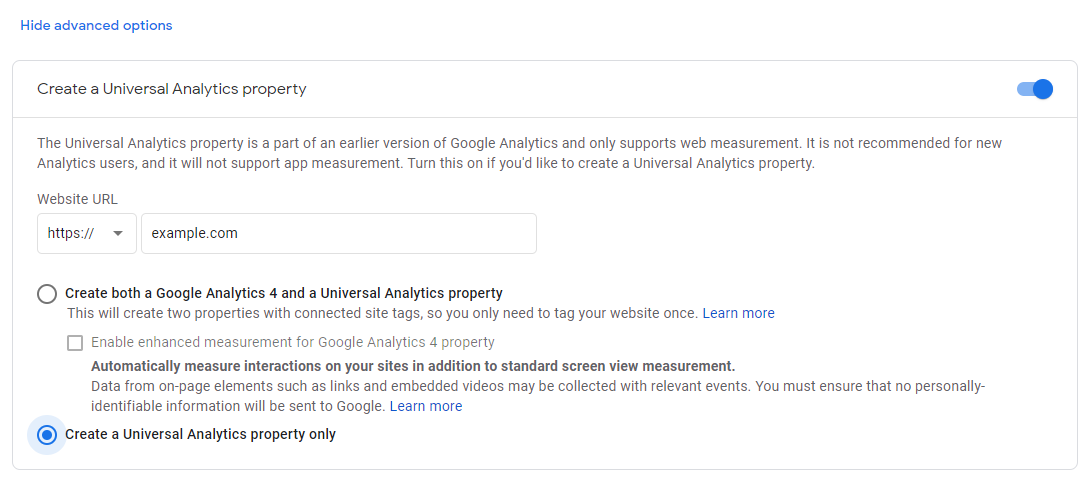
Type the property name and then click "Show advanced options"
-
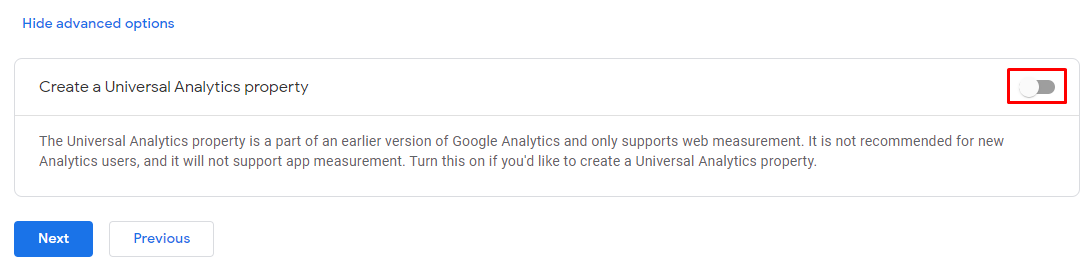
Enable "Create a Universal Analytics property".
-
Enter the Website URL and then select "Create a Universal Analytics property only". Then click Next.
-
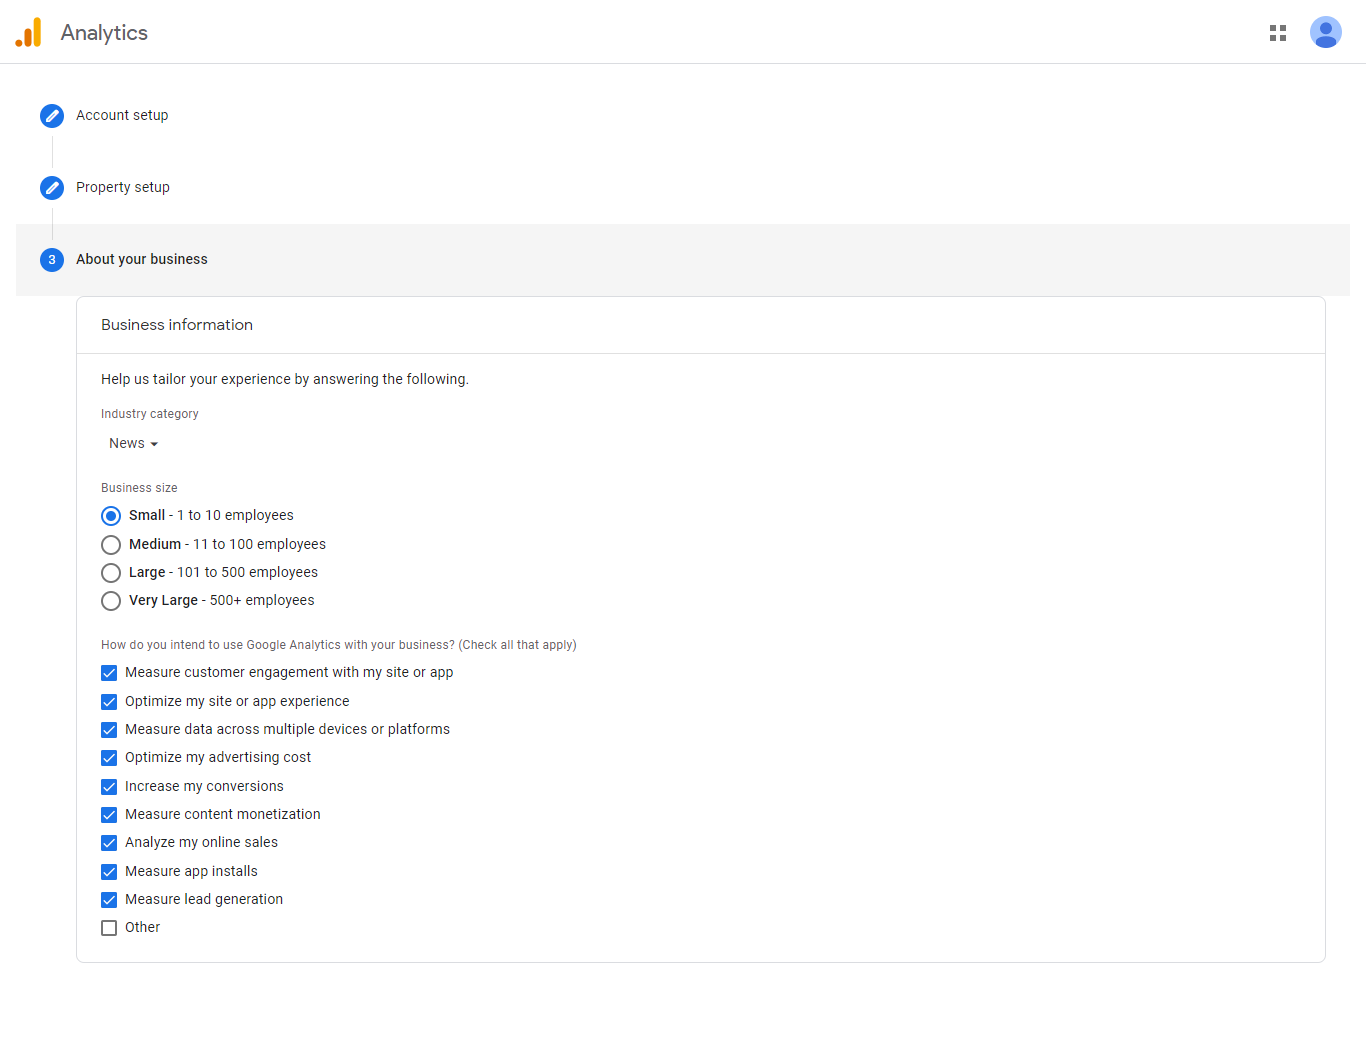
Set about your business, then click "Create"
-
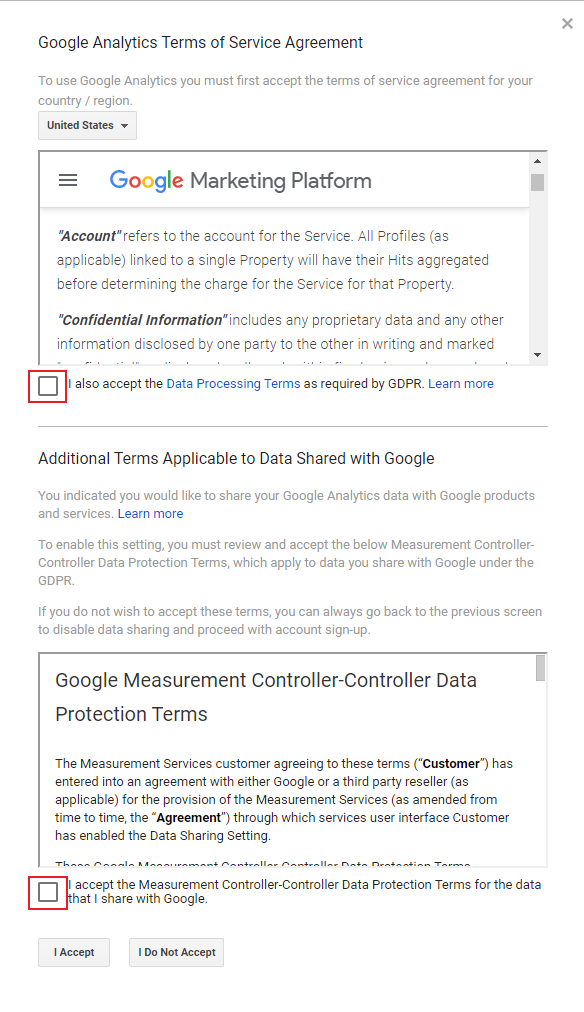
Checklist Term of Service Agreement and cklick "I Accept".
-
Copy and save Tracking ID
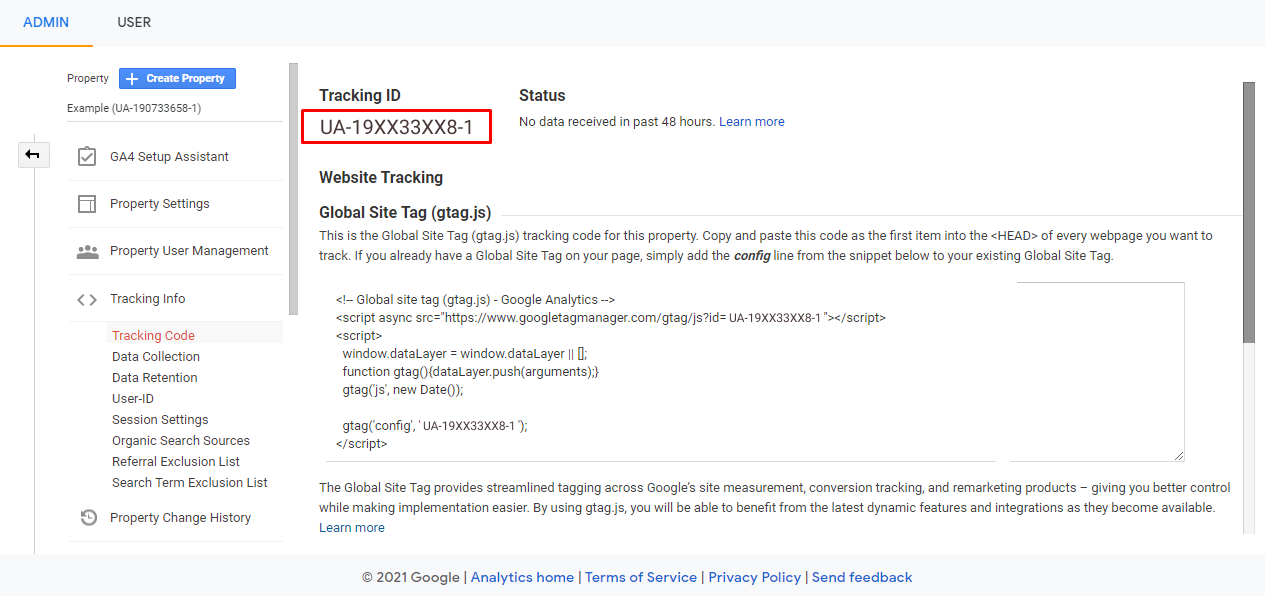
Enter the Tracking ID value in the Google Analytics ID field in Settings menu > Web Config 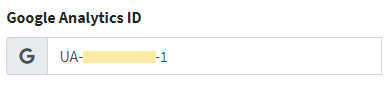
-
Click "Property User Management"
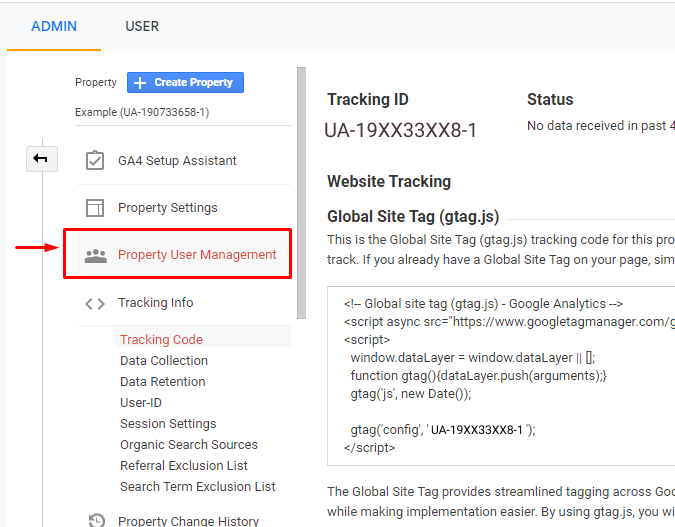
-
Click button plus

-
Click "Add users"
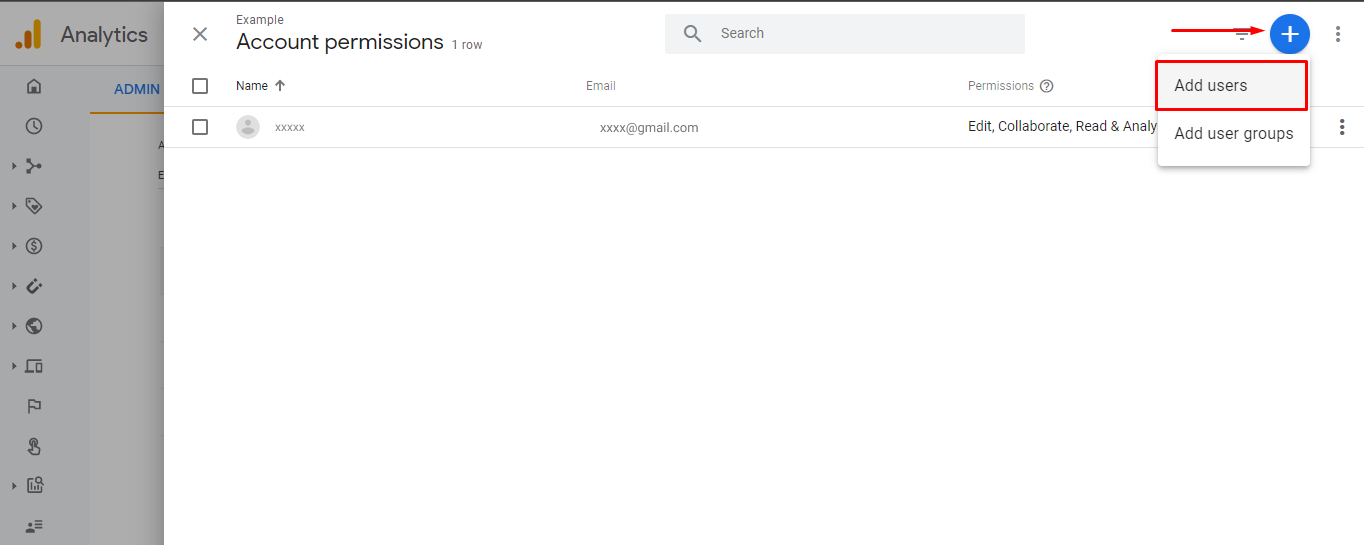
-
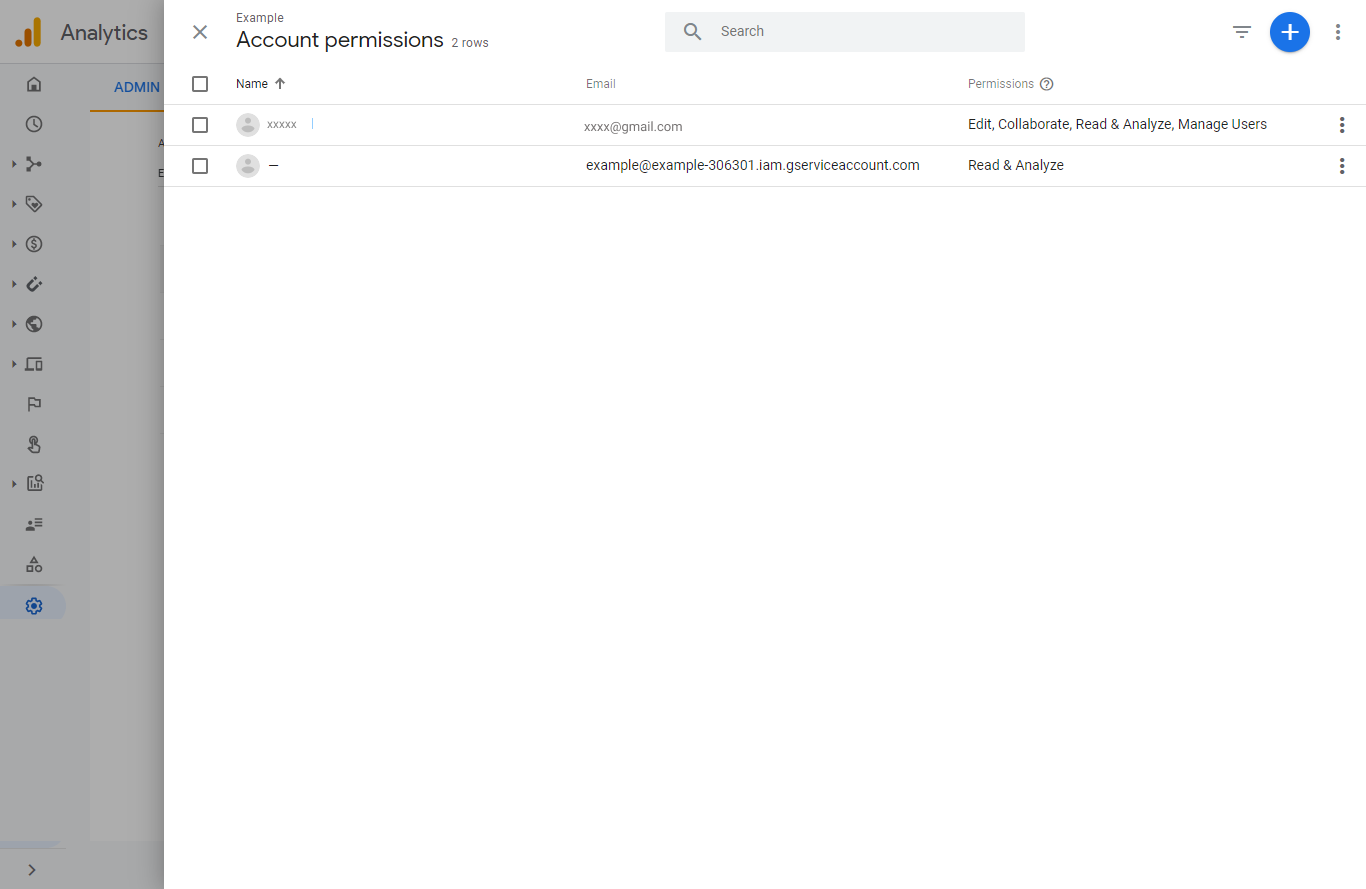
Type the email that you copied from Google APIs, then click "Add".

-
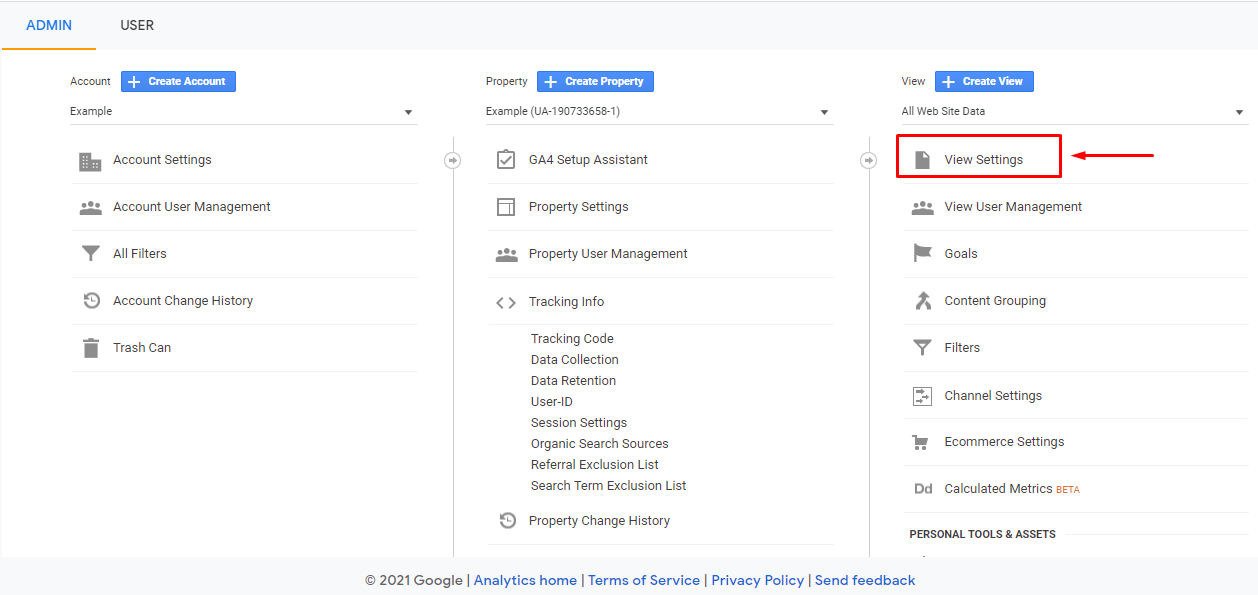
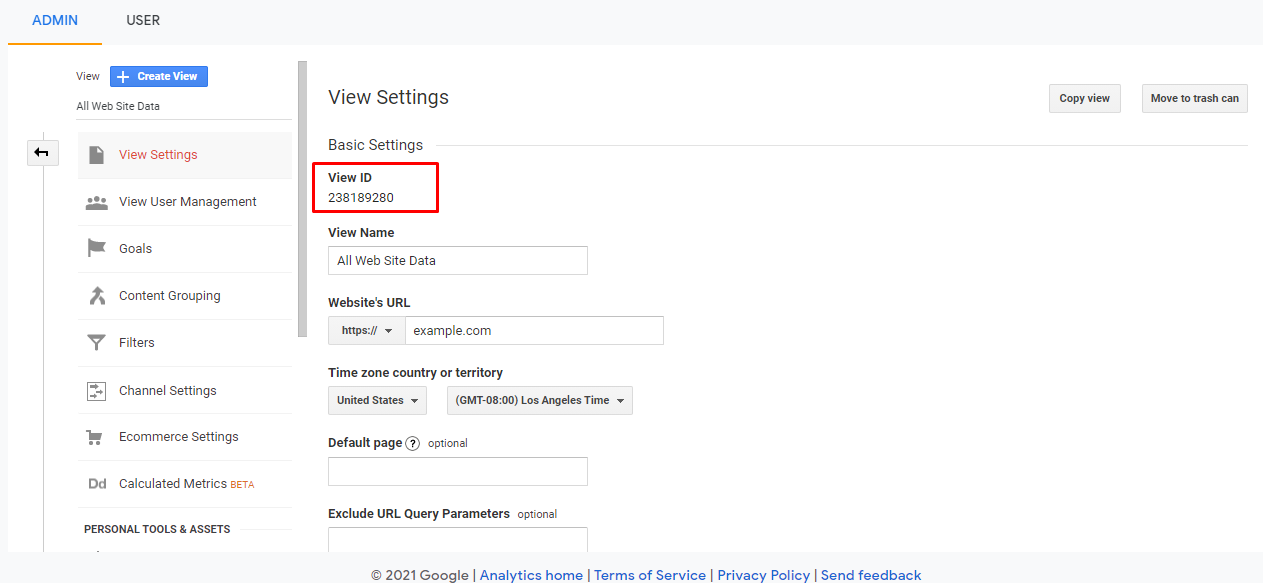
Click "View Settings"
-
Copy VIEW ID
-
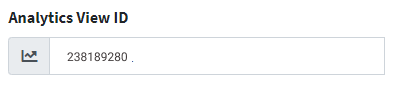
Enter the ANALYTICS_VIEW_ID value in the .env file
ANALYTICS_VIEW_ID=238189280
Or enter it in the Analytics View ID in the Settings menu
== Google re-Captcha :page-partial:
Google re-Captcha
NOCAPTCHA_SITEKEY=
NOCAPTCHA_SECRET=
-
Go to https://www.google.com/recaptcha
-
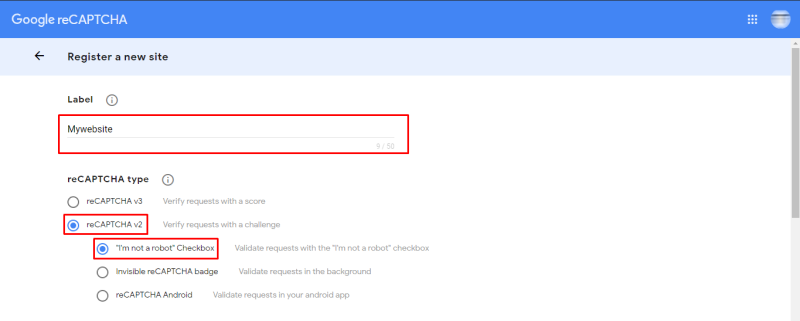
Type Label, click reCAPTCHA v2, click "I’m not a robot" Checkbox
-
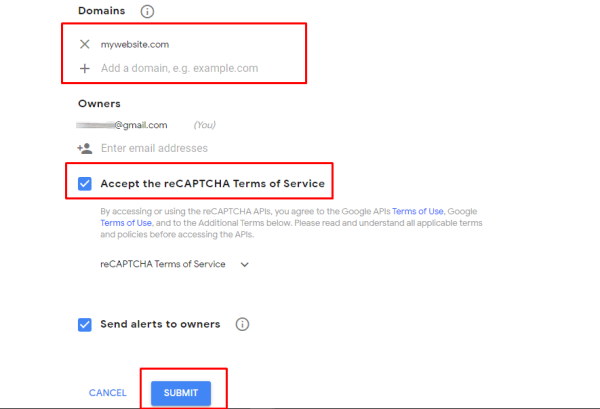
Type domain, click "Accept the reCAPTCHA Terms of Service", click "SUBMIT"
-
COPY SITE KEY to NOCAPTCHA_SITEKEY, COPY SECRET KEY to NOCAPTCHA_SECRET

== Mailchimp
-
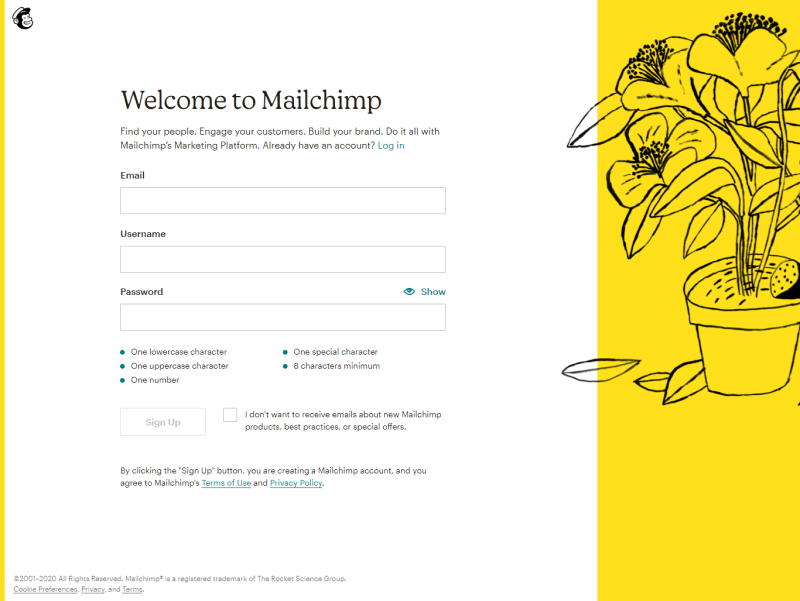
Go to https://mailchimp.com/, click Sign Up Free

-
Fill in the sign up form
-
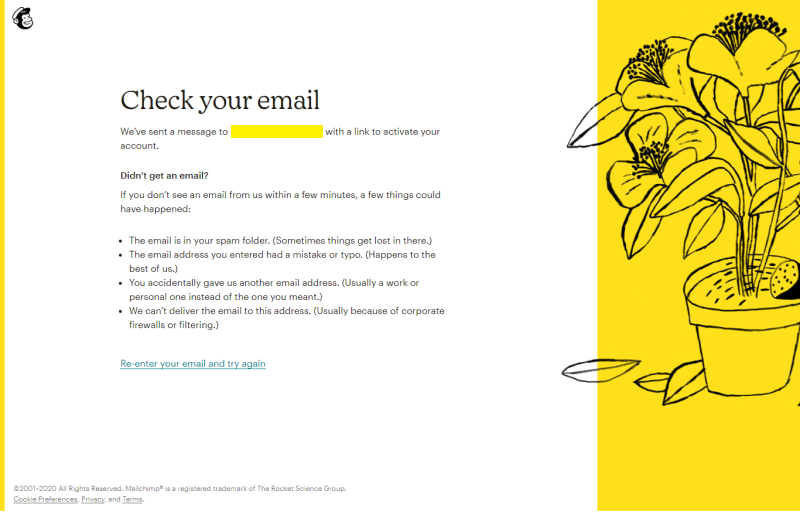
Check your E-mail
-
Click "I’m Not A Robot"

-
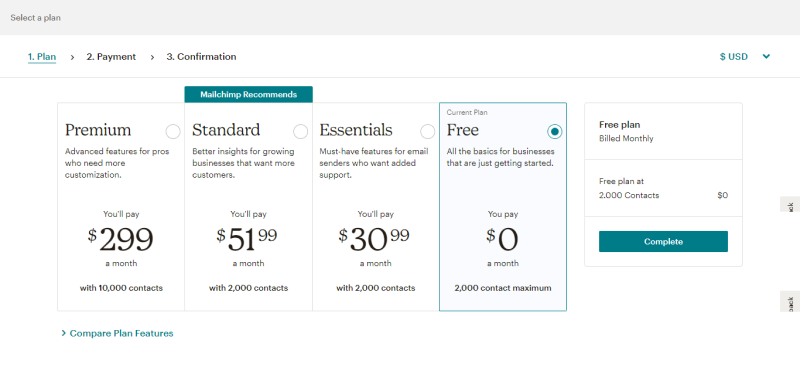
Select "Free" and click "Complete"
-
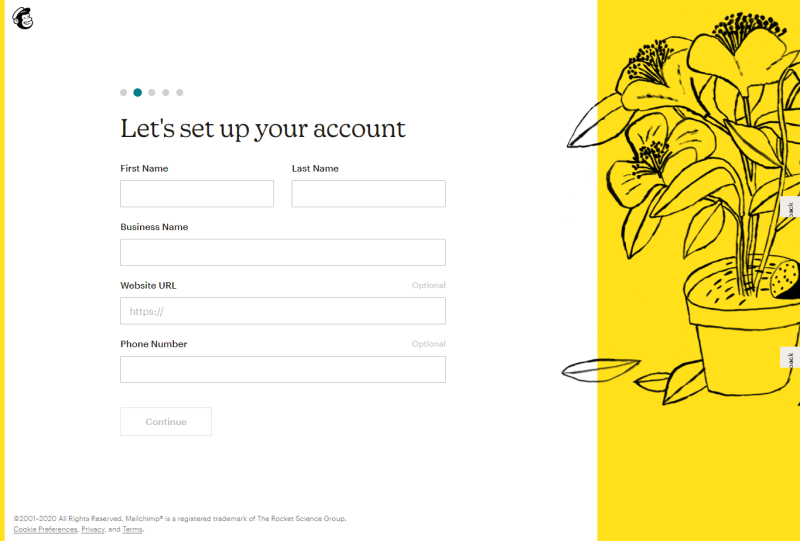
Fill in the form for your account
-
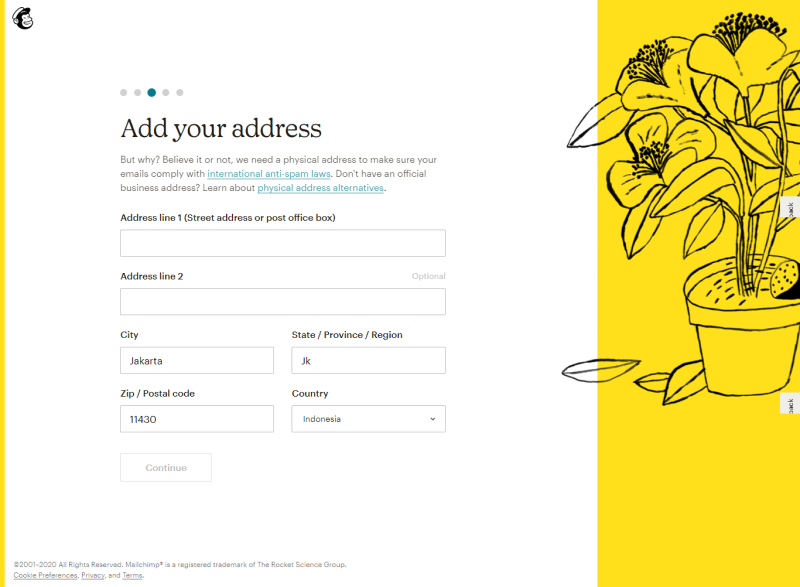
Add your physical address
-
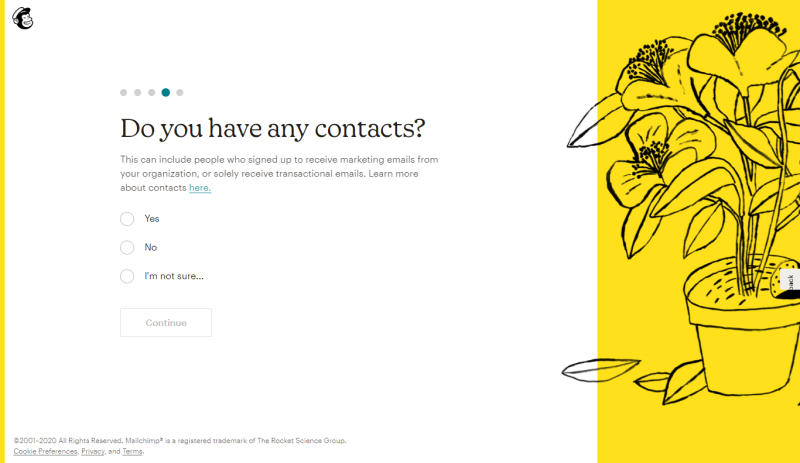
Select yes or no on the question have contacts
-
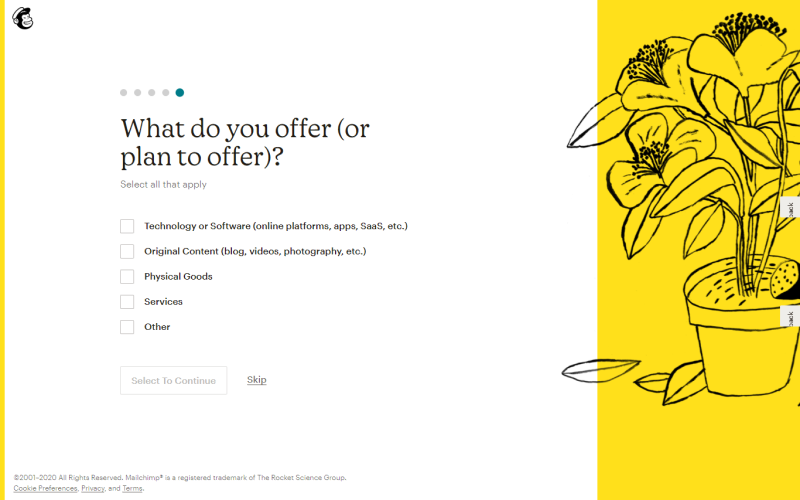
Select your offer
-
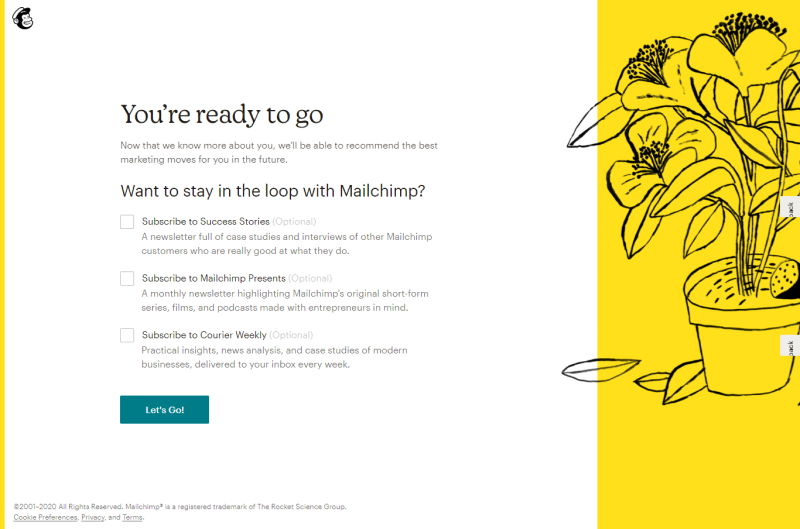
Click "Let’s Go!"
-
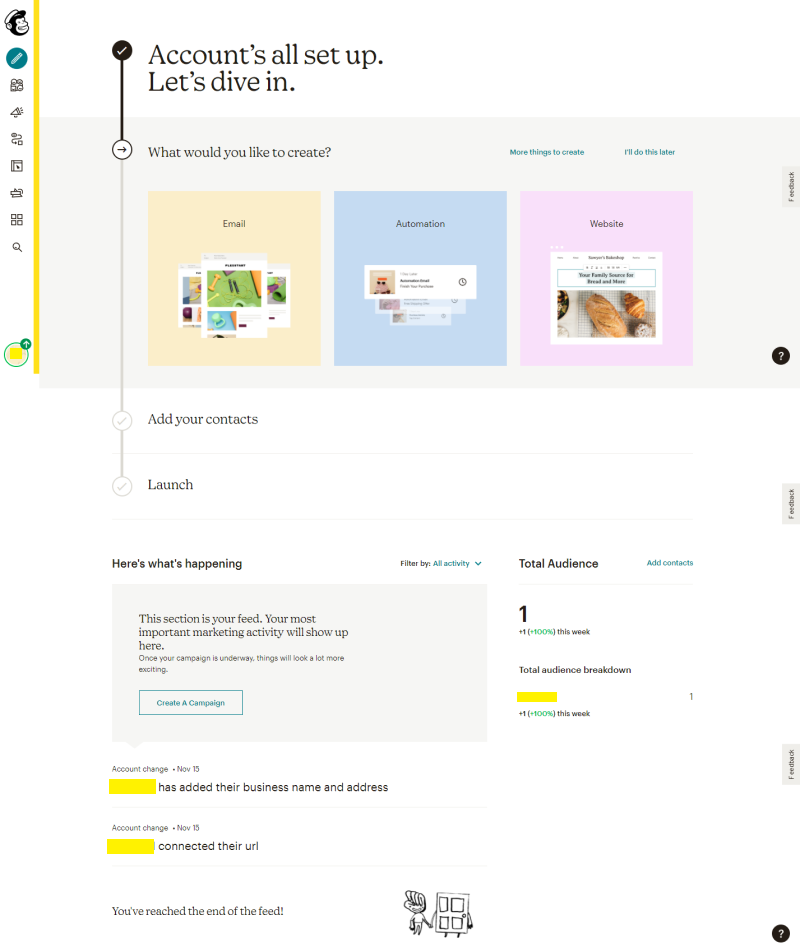
Finish
-
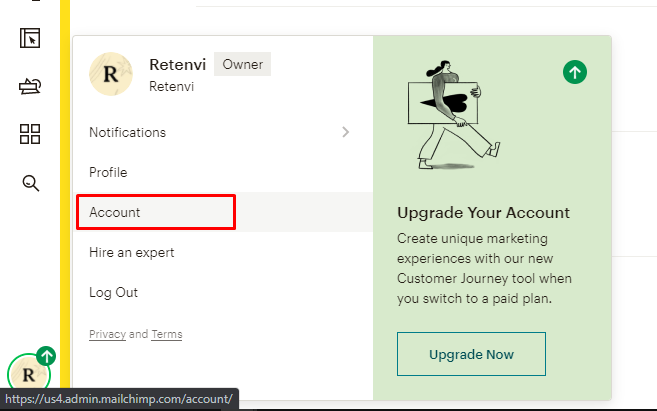
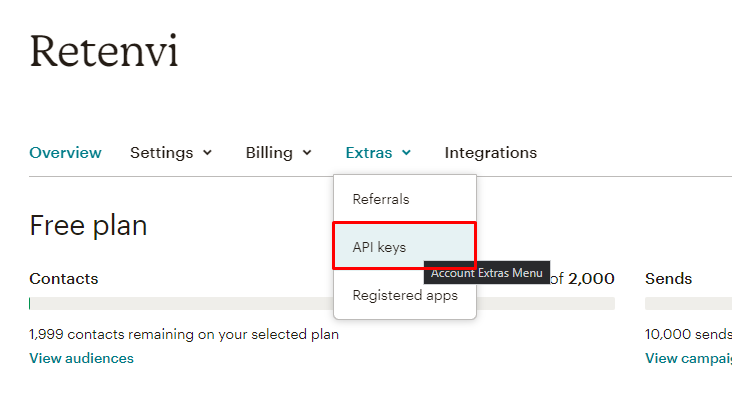
Click "Account"
-
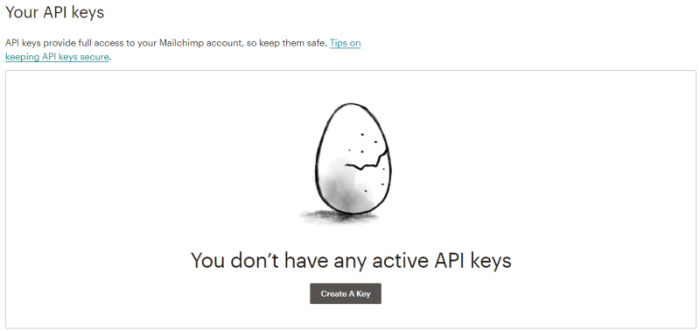
Click "Api keys"
-
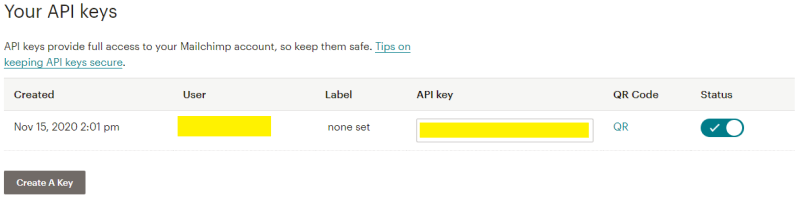
Click "Create a key"
-
Copy Api key to MAILCHIMP_APIKEY value
-
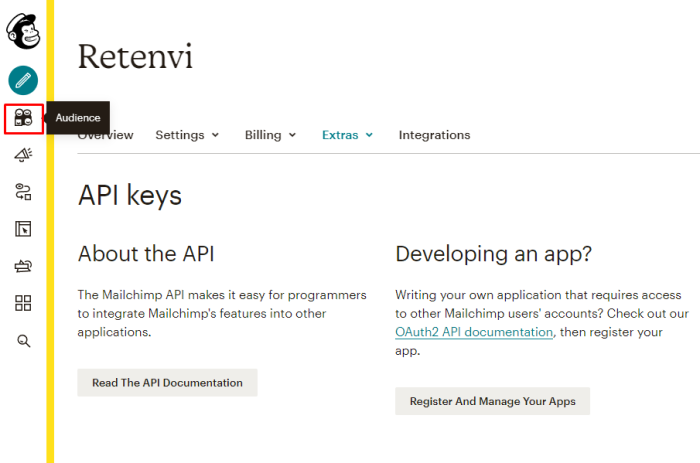
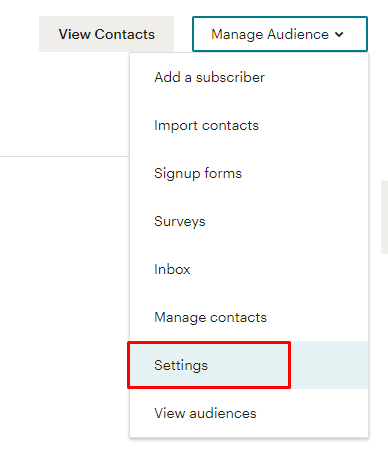
Select menu "Adience"
-
Select "Manage Audience", click "Settings"
-
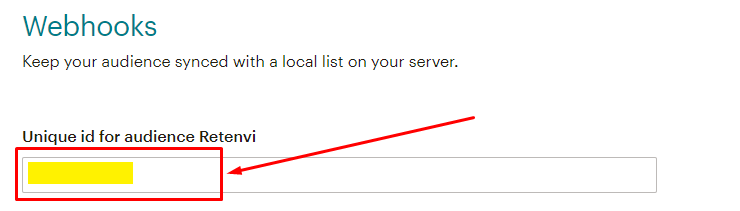
Copy Unique id to MAILCHIMP_LIST_ID value